Basic Welding Symbols
Think you know how to weld? Chances are, if you’re reading this, you probably don’t. Welding is an incredibly complex and nuanced process that takes years of practice to perfect. But before you can even start learning the intricacies of welding, you need to learn the basics. This includes understanding basic welding symbols. In the construction world, welders are a critical part of maintaining safe and sturdy structures. By being able to understand and interpret basic welding symbols, you can ensure that your welds are executed properly and safely. So what do these symbols mean?
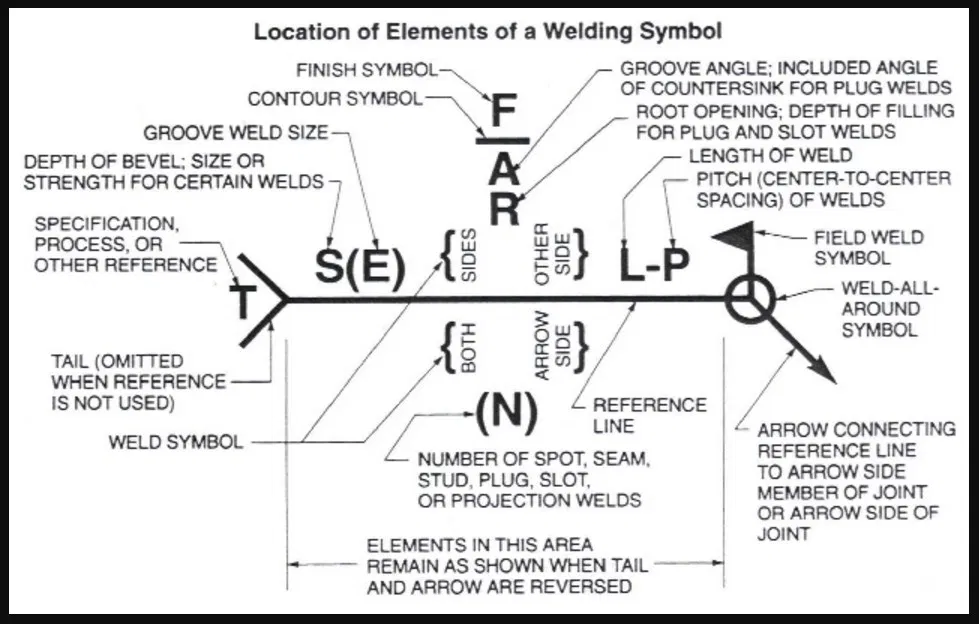
The three main parts of a welding symbol:
- The Head Arrow
This is an important tool for ensuring that your joints are accurate and straight. Sometimes, the line will be curved to point out which part of a joint should have beveled- this can depend on what type or style you’re working with as well.
- The Circle Injuction
When a fillet weld is necessary, the joint needs to be fully encircled by an even roundness. This can only happen when you have pipes that are made out of flat bars and not hexagonal sections as we see with our arrow joints here; if this was true then it would always look like one side was shorter than another since they’re Not concentric (unless someone did some crazy welding).
- The Flag
The welding flag tells you whether the process of joining two pieces should occur in a workshop or on-site during assembly or erection. The absence of this symbol means that it’s okay to carry out these operations in the workshop. If the flag is present, the welding operation is to be completed in the field.
The diagram and information are a generalization. There are multiple different variations of welds that are not mentioned above. For now, it doesn’t hurt to brush up on the basics.